
What you will need
- Small paring knife
- Stable chopping board
- Small bowl of warm water
- Prepared ham glaze - see recipes on our website
- 30-40 cloves (optional)
- Pastry brush
- Large oven tray with rack insert
- Baking paper, string, ribbons and decorative fresh herbs to wrap the end of the hock once cooked
- Serving platter or ham stand
Instructions
- Hock Decoration - To give the ham a decorative look, use a paring knife to cut around the base of the hock in a zigzag pattern, about 10cm from the end. You can also just simply cut straight around the same area if you are short on time

- Removing the Rind - To remove the rind in one piece, start by using a paring knife and running it around the entire edge about 3 cm underneath the rind. Be careful that you keep the fat attached to the ham and run the knife up against the rind. Warm your hands in a small bowl of warm water and run your fingers between the rind and fat gently moving back and forth to gently release it. Carefully use your other hand to gently pull back the rind.

- Diamond Pattern - To give the ham a diamond pattern, score the fat, 2.5cm wide and about ¾ way through in a diamond pattern by running your knife one way and back in the opposite direction the second time. Taking care not to cut into the meat as some of the fat diamonds could fall off during baking.

- Clove Decoration - Push one whole clove into the middle of each diamond shape and continue until each diamond has a clove.

- Ready to Bake - Place the ham onto a rack inserted into roasting pan and pour 3/4 cup of water into the bottom of the pan to prevent the sugary glaze from burning the bottom and to use to baste the ham as it cooks. The water mixes with the glaze that drips off the ham and reduces as it cooks and can be used to create a thicker glaze application for presentation once fully baked. If the ham needs stabilising, then scrunch up some foil and place under certain areas to ensure the ham sits flat so that it caramelises evenly.

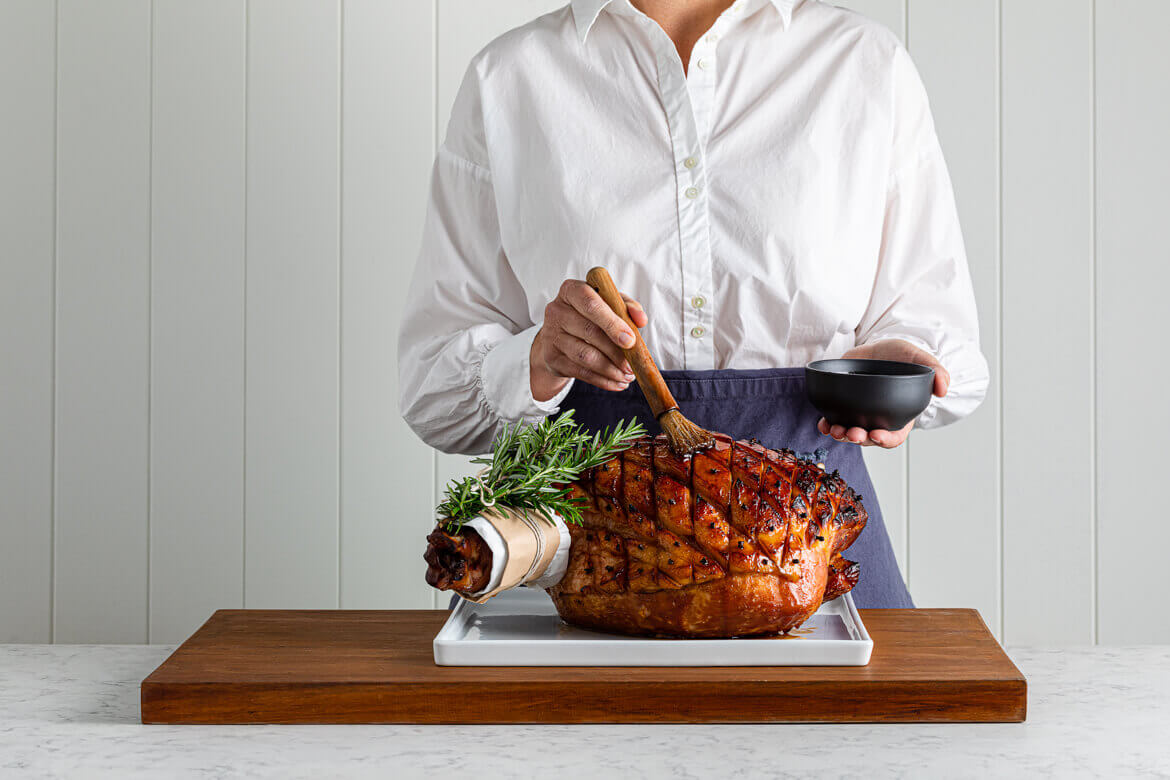
- Glazing - To get an even coverage, use a pastry brush to brush the glaze over the clove-studded ham it will run off a little at this stage but as it cooks it thickens and sticks.

- Baking and Basting - Place in the oven 150/160C for 1.5-2 hours depending on the size. Slow and low is the key to prevent burning and create a consistent colour all over. Baste every 20 mins as this is crucial to create a lovely, deep caramelised colour. Once it’s cooked, take it out to rest and keep basting the ham with more glaze and pan juices as this creates a gorgeous thick glaze.

- Decoration - Wrap the end of the hock with baking paper and string, ribbons if desired as this helps to be able to hold onto something as you carve it – and presents well.

Extra Tips
- To Prepare Ahead: make the glaze up to 2 weeks in advance. Remove the rind from the ham and score it, return to the fridge up to 2 days ahead. On the day of, apply the glaze, bake and baste.
- Make Entirely Ahead: make the glazed ham including baking it, then allow to cool. Place in the fridge covered with baking paper and foil - up to a week ahead. On the day of, remove from fridge and reheat in the oven 150C for approx. an hour just to warm through and revitalise the glaze
- Keep applying the pan juices to the ham once cooked, it creates a delicious extra zing and sticky looking glaze. You can also serve the pan juices warm as a sauce when serving up
- Leftovers - check out our Recipes tab for more inspiration

Half Ham On The Bone
Succulent ham on the bone, the traditional crowd pleaser. Let the festivities begin!
Average Weight: 4.5kg
